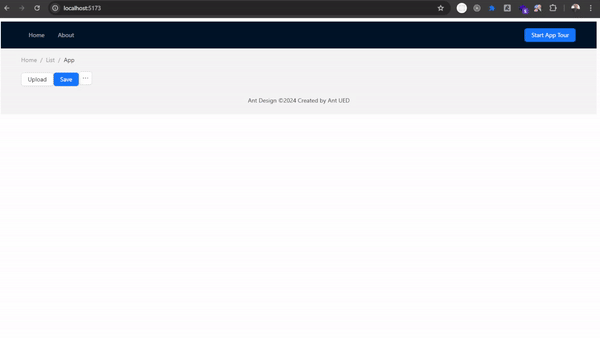
用户游览对于 web 应用程序来说是一项非常宝贵的可用性功能。它们可以让您有效地吸引新用户,并提供分步指南来帮助他们了解软件。导览还可以作为重复任务或高级功能的快速参考。
目标:跨页面游览解决方案
我们的目标是创建一个解决方案,让您能够在 react 应用程序中创建跨多个页面的入门体验。这是它的样子:

ant design tour:本地解决方案
ant design 提供了 tour 组件来创建交互式指南。但是,它有一些限制:
它在单个组件中本地工作。 它严重依赖 react refs,这使得跨多个页面的应用程序不太灵活。这是官方文档中的一个示例,演示了基本的本地实现:
1
2
3
4
5
6
7
8
9
10
11
12
13
14
15
16
17
18
19
20
21
22
23
24
25
26
27
28
29
30
31
32
import react, { useref, usestate } from react;
import { ellipsisoutlined } from @ant-design/icons;
import { button, divider, space, tour } from antd;
const app = () => {
const ref1 = useref(null);
const ref2 = useref(null);
const ref3 = useref(null);
const [open, setopen] = usestate(false);
const steps = [
{ title: upload file, description: put your files here., target: () => ref1.current },
{ title: save, description: save your changes., target: () => ref2.current },
{ title: other actions, description: click to see other actions., target: () => ref3.current },
];
return (
<>
<button type="primary" onclick={() => setopen(true)}>begin tour</button>
<divider />
<space>
<button ref={ref1}>upload</button>
<button ref={ref2} type="primary">save</button>
<button ref={ref3} icon={<ellipsisoutlined />} />
</space>
<tour open={open} onclose={() => setopen(false)} steps={steps} />
</>
);
};
export default app;
虽然此实现对于单页面效果很好,但在 react 应用程序中跨页面游览的场景中却表现不佳。
我们的实现方式如下:
前置步骤,app.jsx,routes.jsx,routesnames.js :
1
2
3
4
5
6
import { routerprovider } from "react-router-dom";
import approuter from "./routes";
export default function app() {
return <routerprovider router={approuter} />;
}
1
2
3
4
export const route_names = {
home: "/",
about: "/about",
};
1
2
3
4
5
6
7
8
9
10
11
12
13
14
15
16
17
18
19
20
21
22
23
24
25
26
27
28
29
30
31
32
33
34
35
36
37
38
39
40
41
42
43
44
45
46
47
48
49
50
51
52
53
import applayout from "./applayout";
import { createbrowserrouter } from "react-router-dom";
import { route_names } from "./routenames";
import { home } from "./components/home";
import { about } from "./components/about";
import { result } from "antd";
import {tourprovider} from "./tourcontext";
const getitem = (label, key, icon, to, children = [], type) => {
return !to
? {
key,
icon,
children,
label,
type,
}
: {
key,
icon,
to,
label,
};
};
const getroute = (path, element, params = null) => {
return {
path,
element,
};
};
const withapplayout = (component) => <tourprovider><applayout>{component}</applayout></tourprovider>;
export const routeitems = [
getitem("home", "home", null, route_names.home),
getitem("about", "about", null, route_names.about),
];
const approuter = createbrowserrouter([
getroute(route_names.home, withapplayout(<home />)),
getroute(route_names.about, withapplayout(<about />)),
getroute(
"*",
<result
status="404"
title="404"
subtitle="sorry, the page you visited does not exist."
/>
),
]);
export default approuter;
第 1 步:设置全球巡演环境
我们使用 react context 来管理游览的全局状态,包括活动的游览步骤。
1
2
3
4
5
6
7
8
9
10
11
12
13
14
15
16
17
18
19
20
21
22
23
24
import react, { createcontext, usestate, useeffect } from "react";
import { usenavigate } from "react-router-dom";
import { app_tours } from "./steps";
const tourcontext = createcontext();
export const tourprovider = ({ children }) => {
const [istouractive, settouractive] = usestate(false);
const navigate = usenavigate();
useeffect(() => {
if (istouractive) {
navigate("/home"); // redirect to the starting point of the tour
}
}, [istouractive, navigate]);
return (
<tourcontext.provider value={{ istouractive, settouractive, steps: app_tours }}>
{children}
</tourcontext.provider>
);
};
export default tourcontext;
第 2 步:定义全球巡演步骤
我们使用 queryselector 通过自定义 data-tour-id 属性动态获取元素,而不是 react refs。
1
2
3
4
5
6
7
8
9
10
11
12
const gettourstepelement = (id) => document.queryselector(`[data-tour-id="${id}"]`);
export const app_tours = {
"/home": [
{ title: "upload file", description: "put your files here.", target: () => gettourstepelement("upload") },
{ title: "save", description: "save your changes.", target: () => gettourstepelement("save") },
{ type: "navigate", to: "/about", title: "about us", description: "learn more about us." },
],
"/about": [
{ title: "about us", description: "heres what we are all about.", target: () => gettourstepelement("about") },
],
};
第 3 步:创建全球游览组件
该组件动态处理跨页面的导航和步骤。
1
2
3
4
5
6
7
8
9
10
11
12
13
14
15
16
17
18
19
20
21
22
23
import react, { usecontext } from "react";
import { tour } from "antd";
import { usenavigate } from "react-router-dom";
import tourcontext from "./tourcontext";
export const globaltour = () => {
const { istouractive, steps, settouractive } = usecontext(tourcontext);
const navigate = usenavigate();
return (
<tour
open={istouractive}
onclose={() => settouractive(false)}
steps={steps}
onchange={(current) => {
const step = steps[current];
if (step.type === "navigate") {
navigate(step.to);
}
}}
/>
);
};
第 4 步:集成到应用程序布局中
游览无缝集成到布局中,可从任何页面访问。
1
2
3
4
5
6
7
8
9
10
11
12
13
14
15
16
17
18
19
20
21
22
23
24
25
26
import react, { usecontext } from "react";
import { layout, button } from "antd";
import { link } from "react-router-dom";
import tourcontext from "./tourcontext";
import { globaltour } from "./globaltour";
const { header, content, footer } = layout;
const applayout = ({ children }) => {
const { settouractive } = usecontext(tourcontext);
return (
<layout>
<header>
<link to="/home">home</link>
<link to="/about">about</link>
<button onclick={() => settouractive(true)}>start tour</button>
</header>
<content>{children}</content>
<footer>© {new date().getfullyear()} my app</footer>
<globaltour />
</layout>
);
};
export default applayout;
第 5 步:添加步骤游览 id
1
2
3
4
5
6
7
8
9
10
11
12
13
import { button, space } from "antd";
import { ellipsisoutlined } from "@ant-design/icons";
export const home = () => {
return (
<>
<button data-tour-id="upload" >upload</button>
<button data-tour-id="save" type="primary">
save
</button>
<button data-tour-id="actions" icon={<ellipsisoutlined />} />
</>
);
};
1
2
3
export const About = () => {
return <div data-tour-id="about">About</div>;
};
以上就是设计和实现 React 应用程序的 Ant Design 全球应用之旅的详细内容,更多请关注php中文网其它相关文章!

