我一直喜欢观看我的单元测试运行(并通过)。它们速度很快,并且通过测试让我确信我的个人作品表现得像他们应该的那样。相反,我经常很难确定浏览器端到端测试的优先级,因为编写和运行它们的速度非常慢。
幸运的是,多年来,用于端到端浏览器内测试的工具已经变得更好更快。通过无头浏览器设置,我可以运行浏览器测试作为 ci 的一部分。
最近,我看到这篇 heroku 博客文章,讨论在 heroku ci 中使用无头 chrome 实现浏览器内测试的自动化。 heroku 有一个安装 headless chrome 的构建包,您可以在 ci 管道中调用它来进行测试。
博客文章中的示例设置是使用 puppeteer 和 jest 测试的 react 应用程序。这是一个很好的开始……但是如果我使用 playwright 而不是 puppeteer 呢?可以吗?
我决定调查一下。事实证明 — 是的,您也可以使用 playwright 来做到这一点!因此,我捕获了在 heroku ci 中使用的无头 chrome 浏览器上运行 playwright 测试所需的步骤。在这篇文章中,我将引导您完成设置步骤。
关于端到端测试的浏览器自动化的简短介绍
端到端测试捕获用户如何在浏览器中实际与您的应用交互,从而验证完整的工作流程。 playwright 通过在 chrome、firefox 和 safari 中进行测试,使这一过程变得非常无缝。当然,在 ci 中运行完整的浏览器测试非常繁重,这就是无头模式有帮助的原因。
heroku 的用于测试的 chrome 构建包将 chrome 安装在 heroku 应用程序上,因此您可以通过非常轻量级的设置在 heroku ci 中运行 playwright 测试。
测试申请简介
因为我只是尝试这个,所以我分叉了最初在 heroku 博客文章中引用的 github 存储库。该应用程序是一个简单的 react 应用程序,带有链接、文本输入和提交按钮。共有三个测试:
验证链接是否有效并重定向到正确的位置。
验证文本输入是否正确显示用户输入。
验证提交表单是否会更新页面上显示的文本。
非常简单。现在,我只需更改代码以使用 playwright 而不是 puppeteer 和 jest。哦,我还想使用 pnpm 而不是 npm。这是我分叉的 github 存储库的链接。
修改代码以使用 playwright
让我们来看看我修改代码的步骤。我从我的分叉存储库开始,与 heroku-examples 存储库相同。
使用pnpm
我想使用 pnpm 而不是 npm。 (个人喜好。)所以,这就是我首先做的:
1
2
3
4
5
6
7
8
9
10
11
12
13
14
15
16
17
18
19
20
~/project$ corepack enable pnpm
~/project$ corepack use pnpm@latest
installing pnpm@9.12.3 in the project…
…
progress: resolved 1444, reused 1441, downloaded 2, added 1444, done
…
done in 14.4s
~/project$ rm package-lock.json
~/project$ pnpm install # just to show everythings good
lockfile is up to date, resolution step is skipped
already up to date
done in 1.3s
将剧作家添加到项目中
接下来,我删除了 puppeteer 和 jest,并添加了 playwright。
1
2
3
4
5
6
7
8
9
10
11
12
13
14
15
16
17
18
19
20
21
~/project$ pnpm remove
babel-jest jest jest-puppeteer @testing-library/jest-dom
~/project$ $ pnpm create playwright
getting started with writing end-to-end tests with playwright:
initializing project in .
✔ do you want to use typescript or javascript? · javascript
✔ where to put your end-to-end tests? · tests
✔ add a github actions workflow? (y/n) · false
✔ install playwright browsers (can be done manually via pnpm exec playwright install)? (y/n) · false
✔ install playwright operating system dependencies (requires sudo / root - can be done manually via sudo pnpm exec playwright install-deps)? (y/n) · false
installing playwright test (pnpm add --save-dev @playwright/test)…
…
installing types (pnpm add --save-dev @types/node)…
…
done in 2.7s
writing playwright.config.js.
writing tests/example.spec.js.
writing tests-examples/demo-todo-app.spec.js.
writing package.json.
将 playwright 配置为仅使用 chromium
您可以在 chrome、firefox 和 safari 中运行 playwright 测试。由于我专注于 chrome,因此我从生成的 playwright.config.js 文件的项目部分中删除了其他浏览器:
1
2
3
4
5
6
7
8
9
10
11
12
13
14
15
16
17
18
19
20
/* configure projects for major browsers */
projects: [
{
name: chromium,
use: { ...devices[desktop chrome] },
},
// {
// name: firefox,
// use: { ...devices[desktop firefox] },
// },
//
// {
// name: webkit,
// use: { ...devices[desktop safari] },
// },
],
…
将 puppeteer 测试代码交换为 playwright 测试代码
原始代码有一个 puppeteer 测试文件,位于 src/tests/puppeteer.test.js。我将该文件移至tests/playwright.spec.js。然后,我更新了测试以使用剧作家的约定,它映射得相当干净。新的测试文件如下所示:
1
2
3
4
5
6
7
8
9
10
11
12
13
14
15
16
17
18
19
20
21
22
23
24
25
26
27
28
29
30
31
32
33
34
35
36
37
38
39
40
const root_url = http://localhost:8080;
const { test, expect } = require(@playwright/test);
const inputselector = input[name="name"];
const submitbuttonselector = button[type="submit"];
const greetingselector = h5#greeting;
const name = john doe;
test.beforeeach(async ({ page }) => {
await page.goto(root_url);
});
test.describe(playwright link, () => {
test(should navigate to playwright documentation page, async ({ page }) => {
await page.click(a[href="https://playwright.dev/"]);
await expect(page.title()).resolves.tomatch(| playwright);
});
});
test.describe(text input, () => {
test(should display the entered text in the text input, async ({ page }) => {
await page.fill(inputselector, name);
// verify the input value
const inputvalue = await page.inputvalue(inputselector);
expect(inputvalue).tobe(name);
});
});
test.describe(form submission, () => {
test(should display the "hello, x" message after form submission, async ({ page }) => {
const expectedgreeting = `hello, ${name}.`;
await page.fill(inputselector, name);
await page.click(submitbuttonselector);
await page.waitforselector(greetingselector);
const greetingtext = await page.textcontent(greetingselector);
expect(greetingtext).tobe(expectedgreeting);
});
});
删除 start-server-and-test,改用 playwright 的 webserver
为了测试我的 react 应用程序,我需要首先在单独的进程中启动它(在 http://localhost:8080) 处,然后我可以运行我的测试。无论我使用 puppeteer 还是 playwright,情况都是如此。使用 puppeteer, heroku 示例使用了 start-server-and-test 包。但是,您可以在运行测试之前配置 playwright 来启动应用程序!
我从我的项目中删除了 start-server-and-test。
1
~/project$ pnpm remove start-server-and-test
在 playwright.config.js 中,我取消了底部 webserver 部分的注释,将其修改为如下所示:
1
2
3
4
5
6
/* run your local dev server before starting the tests */
webserver: {
command: pnpm start,
url: http://127.0.0.1:8080,
reuseexistingserver: !process.env.ci,
},
然后,我从原始 package.json 文件中删除了 test:ci 脚本。相反,我的测试脚本如下所示:
1
2
3
4
"scripts": {
…
"test": "playwright test --project=chromium --reporter list"
},
在我的本地计算机上安装 playwright 浏览器
playwright 安装最新的浏览器二进制文件以用于其测试。因此,在我的本地计算机上,我需要 playwright 安装其版本的 chromium。
1
2
3
4
5
6
~/project$ pnpm playwright install chromium
downloading chromium 130.0.6723.31 (playwright build v1140)
from https://playwright.azureedge.net/builds/chromium/1140/chromium-linux.zip
164.5 mib [====================] 100%
注意: heroku 上的用于测试的 chrome 构建包安装了我们将用于测试的浏览器。我们将设置 ci,以便 playwright 使用该浏览器,而不是花费时间和资源安装自己的浏览器。
在本地运行测试
这样,我就一切准备就绪了。是时候在本地尝试我的测试了。
1
2
3
4
5
6
7
8
9
10
11
12
13
14
15
16
17
18
19
20
21
~/project$ pnpm test
> playwright test --project=chromium --reporter list
running 3 tests using 3 workers
✓ 1 [chromium] > playwright.spec.js:21:3 > text input > should display the entered text in the text input (911ms)
✘ 2 [chromium] > playwright.spec.js:14:3 > playwright link > should navigate to playwright documentation page (5.2s)
✓ 3 [chromium] > playwright.spec.js:31:3 > form submission > should display the "hello, x" message after form submission (959ms)
...
- waiting for locator(a[href="https://playwright.dev/"])
13 | test.describe(playwright link, () => {
14 | test(should navigate to playwright documentation page, async ({ page }) => {
> 15 | await page.click(a[href="https://playwright.dev/"]);
| ^
16 | await expect(page.title()).resolves.tomatch(| playwright);
17 | });
18 | });
哦!这是正确的。我修改了测试,期望应用程序中的链接将我带到 playwright 的文档而不是 puppeteer 的文档。我需要在第 19 行更新 src/app.js:
1
2
3
<link href="https://playwright.dev/" rel="noopener">
playwright documentation
</link>
现在,是时候再次运行测试了......
1
2
3
4
5
6
7
8
9
10
11
~/project$ pnpm test
> playwright test --project=chromium --reporter list
running 3 tests using 3 workers
✓ 1 [chromium] > playwright.spec.js:21:3 > text input > should display the entered text in the text input (1.1s)
✓ 2 [chromium] > playwright.spec.js:14:3 > playwright link > should navigate to playwright documentation page (1.1s)
✓ 3 [chromium] > playwright.spec.js:31:3 > form submission > should display the "hello, x" message after form submission (1.1s)
3 passed (5.7s)
测试通过了!接下来,是时候让我们进入 heroku ci 了。
部署到 heroku 以使用 ci 管道
我按照 heroku 博客文章中的说明在 heroku ci 管道中设置了我的应用程序。
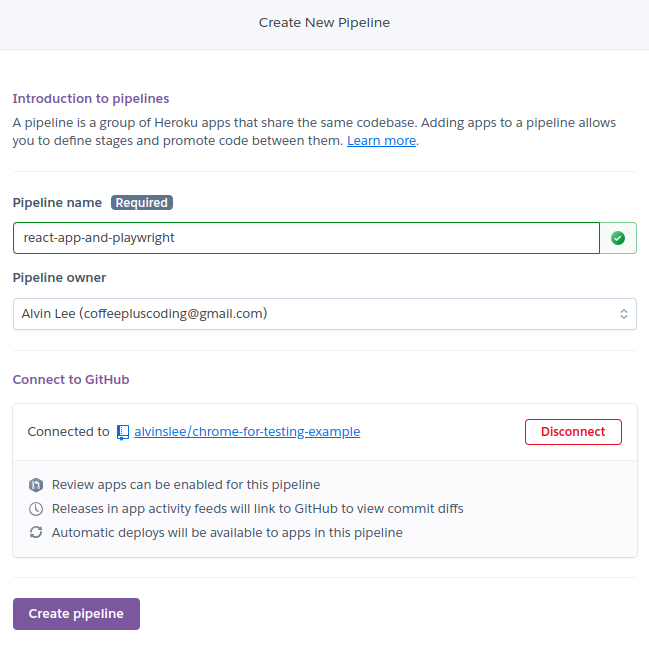
创建 heroku 管道
在 heroku 中,我创建了一个新管道并将其连接到我分叉的 github 存储库。
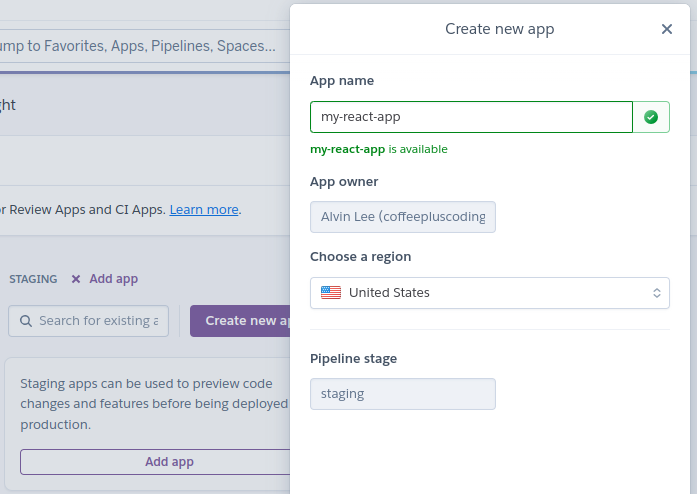
接下来,我将我的应用添加到了 staging。
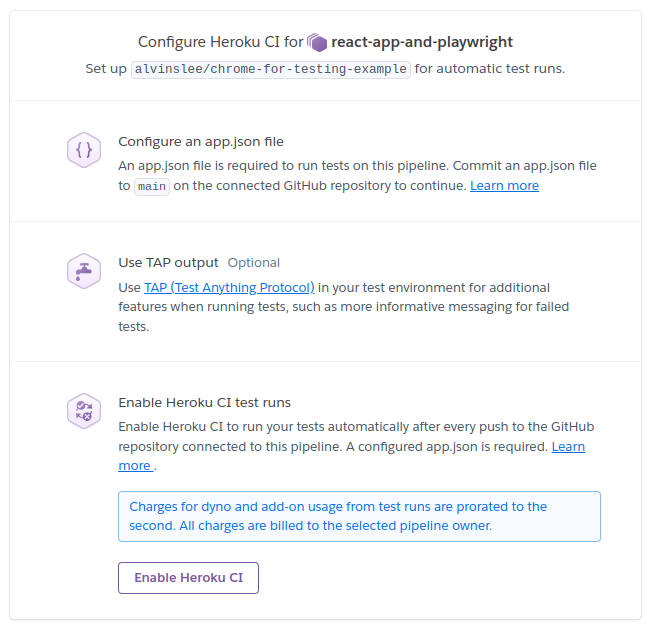
然后,我转到 测试 选项卡并单击 启用 heroku ci。
最后,我修改了 app.json 文件以删除设置为调用 npm test:ci 的测试脚本。我已经从我的 package.json 文件中删除了 test:ci 脚本。现在要使用 package.json 中的测试脚本,heroku ci 将默认查找该脚本。
我的 app.json 文件确保使用 chrome 进行测试构建包,如下所示:
1
2
3
4
5
6
7
8
9
10
{
"environments": {
"test": {
"buildpacks": [
{ "url": "heroku-community/chrome-for-testing" },
{ "url": "heroku/nodejs" }
]
}
}
}
初始测试运行
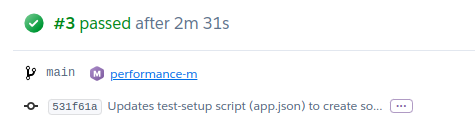
我将代码推送到 github,这触发了 heroku ci 中的测试运行。
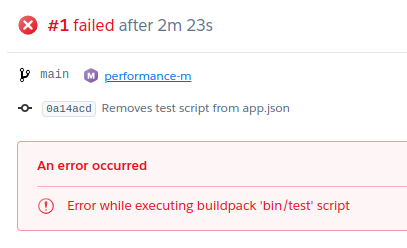
试运行失败了,但我并不担心。我知道需要做一些 playwright 配置。
在测试日志中挖掘,我发现了这个:
1
2
error: browsertype.launch: executable doesnt exist at
/app/.cache/ms-playwright/chromium-1140/chrome-linux/chrome
playwright 正在寻找 chrome 浏览器实例。我可以使用 playwright install chromium 命令安装它,作为我的 ci 测试设置的一部分。但这将违背 chrome 测试构建包的全部目的。 chrome 已安装;我只需要正确指出它即可。
回顾 heroku 的测试设置日志,我发现了这些行:
1
2
3
4
5
installed chrome dependencies for heroku-24
adding executables to path
/app/.chrome-for-testing/chrome-linux64/chrome
/app/.chrome-for-testing/chromedriver-linux64/chromedriver
installed chrome for testing stable version 130.0.6723.91
所以,我想使用的浏览器位于/app/.chrome-for-testing/chrome-linux64/chrome。我只需要剧作家去那里寻找它。
帮助 playwright 找到已安装的 chrome 浏览器
注意:如果您对此处的具体细节不感兴趣,您可以跳过此部分,只需将完整的 app.json 复制到下方即可。这应该为您提供在 heroku ci 上使用 playwright 启动和运行所需的信息。
在 playwright 的文档中,我发现您可以设置一个环境变量,告诉 playwright 您是否为其所有浏览器安装使用了自定义位置。该环境变量是 playwright_browsers_path。我决定从这里开始。
在 app.json 中,我设置了一个这样的环境变量:
1
2
3
4
5
6
7
{
"environments": {
"test": {
"env": {
"playwright_browsers_path": "/app/.chrome-for-testing"
},
...
我将代码推送到 github,看看 ci 中的测试会发生什么。
果然,又失败了。然而,日志错误显示:
1
2
error: browsertype.launch: executable doesnt exist at
/app/.chrome-for-testing/chromium-1140/chrome-linux/chrome
这让我非常接近。我决定这样做:
创建 playwright 期望 chrome 浏览器所在位置所需的文件夹。那将是一个像这样的命令:1
mkdir -p "$playwright_browsers_path/chromium-1140/chrome-linux"
1
2
3
ln -s
$playwright_browsers_path/chrome-linux64/chrome
$playwright_browsers_path/chromium-1140/chrome-linux/chrome
但是,我担心这是否能经得起未来的考验。最终,playwright 将使用新版本的 chromium,并且它不会再出现在 chromium-1140 文件夹中。我怎样才能知道剧作家会看哪里?
就在那时我发现你可以进行浏览器安装试运行。
1
2
3
4
5
6
7
8
~/project$ pnpm playwright install chromium --dry-run
browser: chromium version 130.0.6723.31
install location: /home/alvin/.cache/ms-playwright/chromium-1140
download url: https://playwright.azureedge.net/builds/chromium/1140/chromium-linux.zip
download fallback 1: https://playwright-akamai.azureedge.net/builds/chromium/1140/chromium-linux.zip
download fallback 2: https://playwright-verizon.azureedge.net/builds/chromium/1140/chromium-linux.zip
“安装位置”这一行至关重要。而且,如果我们设置 playwright_browsers_path,我们将看到以下内容:
1
2
3
4
5
6
7
~/project$ playwright_browsers_path=/app/.chrome-for-testing
pnpm playwright install chromium --dry-run
browser: chromium version 130.0.6723.31
install location: /app/.chrome-for-testing/chromium-1140
...
这就是我想要的。借助一点 awk 的魔力,我做到了:
1
2
3
4
5
6
7
8
9
10
~/project$ chromium_path=$(
playwright_browsers_path=/app/.chrome-for-testing
pnpm playwright install --dry-run chromium
| awk /install location/ {print $3}
)
~/project$ echo $chromium_path
/app/.chrome-for-testing/chromium-1140
弄清楚所有这些后,我只需要向 app.json 添加一个测试设置脚本即可。因为 playwright_browsers_path 已经在 env 中设置,所以我的脚本会更简单一些。这是我最终的 app.json 文件:
1
2
3
4
5
6
7
8
9
10
11
12
13
14
15
16
17
{
"environments": {
"test": {
"env": {
"PLAYWRIGHT_BROWSERS_PATH": "/app/.chrome-for-testing"
},
"buildpacks": [
{ "url": "heroku-community/chrome-for-testing" },
{ "url": "heroku/nodejs" }
],
"scripts": {
"test-setup": "CHROMIUM_PATH=$(pnpm playwright install --dry-run chromium | awk /Install location/ {print $3}); mkdir -p "$CHROMIUM_PATH/chrome-linux"; ln -s $PLAYWRIGHT_BROWSERS_PATH/chrome-lin
ux64/chrome $CHROMIUM_PATH/chrome-linux/chrome"
}
}
}
}
我将简要介绍一下测试设置的作用:
考虑到 playwright_browsers_path,使用 playwright install -- dry-run 和 awk 来确定 playwright 将在其中查找 chrome 浏览器的根文件夹。将其设置为 chromium_path 变量的值。
在 chromium_path/chrome-linux 中创建一个新文件夹(以及任何必要的父文件夹),这是 playwright 将在其中查找 chrome 二进制文件的实际文件夹。
在该文件夹中创建一个符号链接,以便 chrome 指向 chrome 的 heroku buildpack 安装 (/app/.chrome-for-testing/chrome-linux64/chrome)。
再次运行测试
通过我更新的 app.json 文件,playwright 应该能够使用 buildpack 中的 chrome 安装。是时候再次运行测试了。
成功!
测试设置脚本按预期运行。
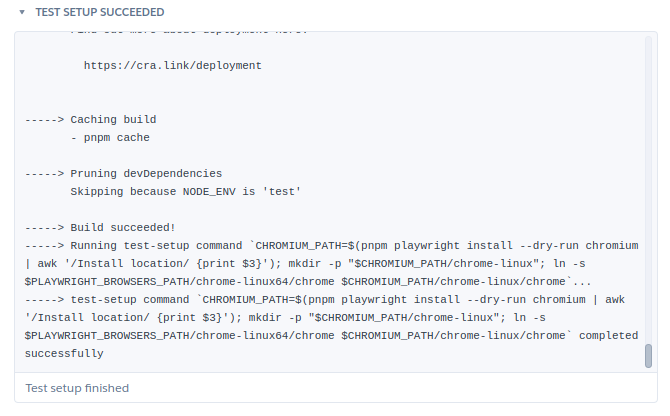
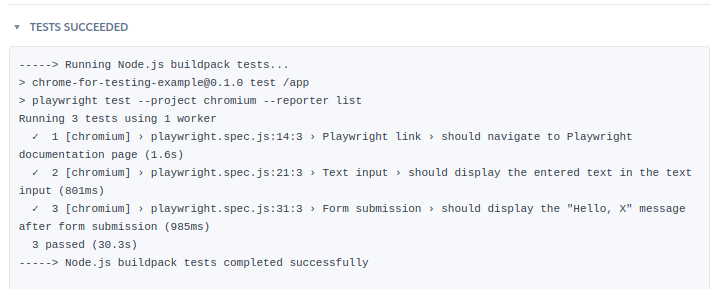
playwright 能够访问 chrome 二进制文件并运行测试,并且通过了。
结论
我的 web 应用程序的端到端测试变得不再那么麻烦,因此我越来越优先考虑它。最近几天,这意味着更多地使用剧作家。它灵活且快速。现在我已经完成了工作(对我和你!),在 heroku ci 中使用 chrome for test 构建包启动并运行它,我可以开始构建我的浏览器自动化测试套件了再次。
本演练的代码可在我的 github 存储库中找到。
编码愉快!
以上就是Heroku 中的 Playwright 和 Chrome 浏览器测试的详细内容,更多请关注php中文网其它相关文章!